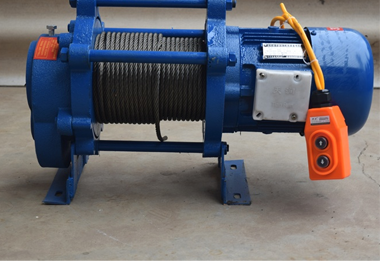
I. Unpacking and checking specifications and accessories
1. Take the product out of the box, and when taking it out, pay attention to keeping the chain straight. At the same time, avoid collision with the motor, and place the body straight outside the box.
2. Check whether the instructions, certificate of conformity, rain cover and pin shaft assembly are complete and stored properly.
II. Installation
Installation of upper lifting point
1) Remove the lifting point screw rod, spring, and nut from the machine body and install them on the lifting point on the frame.
2) Connect the screw rod and the machine body, and connect a special sensor between the screw rod and the machine head. Be careful not to omit the gasket during installation to prevent the machine head from being skewed and not straight during later use, which may lead to insufficient engagement between the chain and the gear, and long-term use may damage the chain and gear.
2. Installation of lower lifting point
Before installation, it is necessary to check whether the chain is smooth and whether there are any twisting errors. If there are any problems, they can be corrected by reversing the lower lifting point in the opposite direction of the twisting errors until the welding seams of the chain link face up and down uniformly.
1) Connect the lower lifting point to the frame connection point and fix it properly.
2) During installation, pay attention to the orientation of the motor, which generally faces the frame.
3. Power connection
1) Connect the power cord of the sub control box to the power supply of the machine body, and ask professional personnel to operate the wiring to ensure correct connection.
After the connection is completed, turn on the power and lift it with one button through the control system. Check whether the running directions of each machine body are consistent one by one. If there are any differences, please correct the power wiring of the problematic machine body in a timely manner.
4. Tensioning
Tighten the screw spring by tightening the lifting point screw nut, and observe the weight displayed on the corresponding sub control box of the machine body to determine the completion of the tensioning process. Generally, when the sub control box displays 450-500kg, the tensioning process is completed.
5. Middle section fixation
1) Before installing the middle section, it is necessary to check whether the chain is smooth and whether there is any misalignment. If there is a problem, it can be corrected by rotating the upper or lower parts of the middle section 360 degrees until the orientation of the chain link weld at the chain inlet and outlet gear is consistent with the orientation of the chain link weld at the middle section.
2) Manually operate the corresponding sub control box of the machine body to move the middle section to the position of the wall support, and then fix it with a special pin shaft.
6. Installation of rain cover
Fix the special rain cover at the machine head. After installation, check whether the rain cover hinders the chain operation. If there are any problems, timely solve them.

Previous: How to repair inclined steel plate lifting tongs? What if the steel plate lifting tongs tilt?